Tuesday, June 30, 2009

It's Creamy, It's Tasty, and It Looks Good in Stripes

In honor of July 4th, we at the Rel Maples Culinary Institute of Culinary Arts decided to salute our nation in the form of... ice cream. We made quite a few different flavors (pecan praline, mint chocolate chip, hazelnut coffee chocolate chunk, vanilla bean, sweet cream, brandied cherry, blueberry swirl, and fresh lemon sorbet), but we had a patriotic idea... why not stripe the cherry, vanilla, and blueberry swirl for a red, white, and blue treat? And that is exactly what we did. Here's a little overview from start to stripes...

Pink soup? Nope. It's the base for the brandied cherry ice cream - the "red" portion of our patriotic dessert. Chef Hallman says that you always make the base the day before and let it chill overnight. That makes for the creamiest ice cream the next day. So, for the base, we used half heavy cream and half milk. Then we added sugar, salt, and glucose syrup. To achieve the brandied cherry flavor, we added crushed maraschino cherries and a splash of cherry-flavored brandy. Yum! This one will be for adults only... haha. Then we just let it simmer on the stove for a few minutes until it thickened.


The next thing we needed to do was make it red. This was not an easy task. I'm not sure if you've ever tried to make really red icing using food coloring, but it takes almost an entire bottle of the stuff. And, even after we did that, it was a bright fuschia.... NOT patriotic red. But, we hoped it would darken as it chilled...


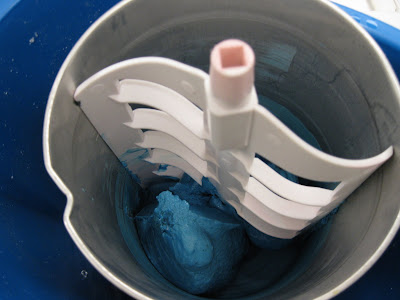
Here is the blueberry swirl ice cream (the "blue" portion) after it chilled and turned in an ice cream maker for about 15 minutes. When it stops spinning... it's done! After this stage, then you swirl in the blueberry mixture by hand.

And... voila! You have a tri-color dessert of patriotic proportions! And there I am.... in the freezer... posing with our masterpiece. So what if the red is actually pink, the white is actually off-white, and the "stripes" are more like wavy lines? We did it! I think people will get the idea. And if they don't .... they are lame.


Monday, June 29, 2009

A Little How-to-Do

Since I found this fascinating, I thought I would share it!

How to cover the sides of a cake with a chocolate ribbon:

Step 1: Temper chocolate.
Just heat some melting chocolate (nothing with paraffin) in a double boiler until it is melty and liquidy.


Step 2: Spread the chocolate on measured plastic
Measure a piece of shiny, thick plastic (a heavy duty garbage bag would work well) to be the height, width, and circumference of the cake. Make sure that it is a little longer than you want it so you can overlap it a little bit. Then spread a thin and even layer of chocolate on the plastic with a spatula.

Step 3: Put the chocolate ribbon on the cake
Place the chocolate ribbon, chocolate side in, on the cake and press lightly so that the melted chocolate will attach, somewhat, to the sides of the cake.


Step 4: Peel it off
Let it sit for a minute or two and peel the plastic backing off of the chocolate. Try to overlap a little where the seam is. You can take a hot spatula and fix that area later.


Step 5: Ta dah!
And there you have it... a shiny, smooth, and easy way to make any cake more beautiful and, best of all, more chocolate-y!
- Mari


Thursday, June 18, 2009

That's How I Roll


I am loving Advanced Baking... more than I should. I always thought that I liked the flexibility of hot foods more than the rigidity of baking. I am slowly going to the darkside (baking, that is). Of course, it doesn't help that our teacher, Chef Catherine Hallman, is the most amazing person/chef/instructor I think I've ever had/known. She can fix anything that I might ruin (like if I were to try to soak instant dry yeast in water when you are only supposed to soak active dry yeast...). Yes, she's a miracle worker.


The above photograph is of the spread that our baking class created for a continental breakfast at school. It includes cinnamon rolls, donuts, cherry cream cheese danishes, cinnamon pecan twists, grissini breadsticks, and mini bagels. We were so proud of ourselves. :)
Some things I've learned so far in Advanced Baking that I thought I would share:
  1. The best cinnamon sugar mixture, according to Chef Hallman is 1 lb. granulated sugar, 1 lb. brown sugar, 4-5 T cinnamon, and enough canola oil to make it moist. This makes for the perfect sugar:cinnamon ratio that will not fall out of whatever it is you are making.
  2. The key to delicious homemade bagels is organic barley malt syrup in the dough and in the water that you boil them in. This can be purchased from King Arthur Flour's website. The ones we made tasted exactly like real live bagels... not the kind you buy in a bag at Food City.
  3. The best icing/glaze for cinnamon rolls or danishes is so simple! Just pour one 16 oz. box of confectioner's sugar into a mixing bowl. Then add about 1/2 cup of clear Karo Syrup and a couple glugs of whole milk. Then mix until it is the perfect consistency for what you need it for. Not only does it taste delicious, it won't crack/crumble once it dries... a common problem with other glazes.
Next week we are making something I have always wanted to make... petit fours!

Thursday, June 11, 2009

Too Late to 'Pologize?


Sorry it's been so long since I've updated. School has a tendency to (A) freak me out and (B) take up quite a bit of time. So, here's what's been happening since I last wrote:


1. I survived a year of culinary school. Tah dah! I've learned so much I can't even comprehend it. I finished cake decorating... which was awesome, difficult, and super rewarding. The photo above is me and my final exam cake. It was a lot of work, but I was so proud of it! I also finished Culinary II. I'm much more confident in my cooking abilities now. I can't wait to see what we do next semester!
2. I'm two days into the summer semester right now. I'm taking Advanced Baking (and Principles of Management.... I know, thrilling, right?) with the amazing Chef Catherine Hallman. She can fix anything, make anything, and do anything you need when it comes to baking. We've already made:
- Brioche rolls (oh the buttery goodness...)
- Lemon Buttermilk Poundcake (light and delicious)
- Chocolate Marquise Torte (dang. this thing had a lot of pieces...)
- Italian Buttercream Frosting (the best frosting I've ever eaten in my entire life. period.)
- Gianduja (basically, a fancy name for nutella)
- Japonaise (hazelnut meringue)
- Chocolate Chiffon Cake (chocolate cake with meringue folded into the batter)
- Cointreau (simple syrup flavored with Triple Sec)
- Soft Ganache
- Hard Ganache
- Havana Torte
Yes, we made all this in two days! Intense? Indeed it was. But, I'm learning quite a bit and am loving every minute of it. There are only seven of us in the class, so we can get a lot of one-on-one time with Chef. Awesome times!
So, I'll try to be better about updating... but, until then, peace, love, and hair grease (to quote Dusting Cochran).
Mari