Showing posts with label cheese. Show all posts

Saturday, July 2, 2011

Eggplant & Zucchini Gratin


It's been a while since I've posted a recipe, and I apologize. My job has gotten more intense (which is a good thing), and I've had less free time. But, that's really no excuse since we've still been eating meals every day... and I've been cooking them.

For instance, two nights ago I made this not-so-healthy-but-OMG-delicious gratin inspired by Ina Garten's Eggplant Gratin. (Though, her recipe makes It's a teensy bit time-consuming, but worth it in the end (and can be enjoyed for 3 nights...)! It tastes like eggplant Parmesan bought sexy lingerie to impress its significant other.

Eggplant & Zucchini Gratin

Olive oil, for frying

All purpose flour

Garlic Salt

3 small eggplant, peeled, sliced 1/4-inch thick

1 large zucchini, peeled, sliced 1/4-inch thick

15 oz. container low fat ricotta cheese

2 extra-large eggs

1 cup half-and-half

Grated Parmesan

Kosher salt

Freshly ground black pepper

3/4 jar tomato sauce

Shredded mozzarella cheese

Preheat the oven to 400 degrees F.

Put some all purpose flour into a bag with a few pinches of garlic salt. Add a few pieces of eggplant & zucchini and toss to coat.

Heat about 1/8-inch of olive oil in a very large frying pan over medium heat. When the oil is almost smoking, add several slices of eggplant/zucchini and cook, turning once, until they are evenly browned on both sides and cooked through, about 5 minutes. Be careful, it splatters! Transfer the cooked eggplant & zucchini slices to paper towels to drain. Add more oil, heat, and add more eggplant & zucchini until all the slices are cooked.

Meanwhile, in a medium bowl, whisk together the ricotta, eggs, half-and-half, teaspoon salt, and teaspoon pepper. Note: When using the lowfat ricotta, it will be harder to mix because it doesn't have as much moisture or fat in it. Just be patient and keep whisking! It will get there!

In a 9x13" baking pan, place a layer of eggplant & zucchini slices in the bottom, sprinkle with Parmesan, and spoon 1/2 of the tomato sauce over it evenly. Next, add a half of the ricotta mixture and spread evenly. Repeat the process by adding a second layer of eggplant & zucchini, more Parmesan, the other half the ricotta mixture, and finally grated Parmesan on top. As a finishing touch, sprinkle the shredded mozzarella over the entire top of the gratin.

Place the gratin in the oven on the middle rack and bake for 35-40 minutes or until the custard sets and the top is browned. Let cool 8-10 minutes. Serve!
And here are some photos to help you get through the process...

An eggplant still life
It's in the bag, yo.
Fryin' em' up!

Mmmm... crispy

Layered in the pan
Covered in sauce and cheese = how I want to die.

More cheese :)

Ta dah! Bellissimo!

Good grief this tastes good...

I hope you make this and enjoy it as much as I did! :)

Happy summer!

~ Mari

Friday, February 11, 2011

Cheddar & Pepper Turkey Burgers


I love turkey burgers because they are much better for you than most other burgers, but they can sometimes be dry and flavorless. So, I consulted my healthy-cooking bible (Ellie Krieger's "The Food You Crave") and adapted a recipe of hers for stuffed turkey burgers.

Here is what I came up with:

Cheddar & Pepper Turkey Burgers

1 lb. 85/15 ground turkey
1 lb. 99% fat free ground turkey
3/4 cup chopped roasted red or yellow peppers
1 cup shredded cheddar cheese
1/4 cup chopped fresh parsley
1 1/2 Tbsp. garlic salt
1 Tbsp. smoked paprika
2 tsp. ground black pepper
1 large egg

Preheat the broiler to high (or prepare the grill if it isn't cold and rainy outside like it is here!). In a large bowl, combine all ingredients with your hands. Divide the mixture into 10 patties (about 3-4 inches in diameter and 1/2-inch thick). Wrap the extra patties in plastic wrap and freeze. Put four (or however many you want to make) patties on a sheet pan (one with a lip on the side) and broil for 10-12 minutes (or until they are browned and the internal temperature is at 165 degrees F). Remove from the oven and cool.


- the spices & peppers -

- ready to be divided into patties! -
- yummy! -
- the finished product -
 (on *homemade* buns - aren't I impressive? hah!)
I hope you enjoy these moist and delicious burgers as much as Ryan and I did! :)

~ Mari

Thursday, February 3, 2011

Two Dinners, One Chicken Recipe


I love killing two birds with one stone. Not literally, of course. I don't kill any birds with any stones (if you did want to kill a bird, though, would one really use a stone?). But, in the culinary realm, making one dish that can then become two dinners is pretty sweet.

I've mentioned the wonderfulness of Ellie Krieger before on this blog. She is a nutritionist-turned-cook that had her own show on Food Network. I own both of her cookbooks and use them probably twice a week. While browsing through her "The Food You Crave" cookbook, I came a cross a recipe for Crispy Chiken Fingers that looked easy, healthy, and delicious. Surprise! It was all of those things. 

And here is what I came up with:

Crispy chicken fingers with homemade honey mustard dressing and steamed broccoli
Yum!

The chicken came out delicious! Moist on the inside and super crunchy on the outside - just how chicken fingers should be. Plus, the only ingredients were chicken breast, buttermilk, cornflakes and spices. So very simple.

Since I made the chicken fingers out of two huge chicken breasts, I had about half left over for the next night. I thought I could just heat them up in the toaster oven and have some salad to go with it. Then I had a revelation! Why not put the crispy chicken fingers ON the salad? Hot dog! (granted, it wasn't an original idea, but it was an exciting one) So, I made my version of my favorite salad that they serve at O'Charley's, T.G.I. Fridays, and a few other restaurants: Chicken Tender Salad with Mandarin Oranges, Candied Pecans, Dried Cranberries, and Gorgonzola Cheese. Of course I made a few adjustments...


First, I started with the lettuce: Boston Red Leaf & Radicchio. Next, I candied my own walnuts (they're a little better for you than pecans) and added them to the big bowl of lettuce. Then I crumbled some Gorgonzola cheese on top (on sale at Kroger - score!) and added some tangerine segments (instead of the canned ones). Then I made the salad dressing - a simple balsamic vinaigrette (balsamic vinegar, honey, mustard, and EVOO).


Lastly, I added the crispy chicken to my big bowl of yumminess and devoured it!
Mmmmm... it was so tasty!

As a side note, my wonderful husband isn't a fan of Gorgonzola or oranges... or balsamic vinaigrettes, so I made him his own ryan-friendly version:


For his, I just left off the ingredients he didn't like and made a honey mustard vinaigrette from the leftover dipping sauce from the night before! Fancy!

I hope everyone is having a great start to February!

~ Mari

Thursday, January 27, 2011

Mexican Pasta Bake

The other night I was craving Mexican food... and pasta (as a side note, I'm almost always craving pasta, so it's really not that unusual) so I decided to take a recipe I saw in Martha Stewart Everyday Food Magazine and change it up a bit. Instead of corn tortillas, I used rotini pasta. Oh yeah - it's as if Italian food and Mexican food made sweet sweet love in a casserole dish. It's so easy, you'll say gracias/grazie!

Mexican Pasta Bake

1 Tbsp. olive oil

3/4 lb. Rotini Pasta, cooked and drained

1/2 large onion, sliced

15-20 baby bella mushrooms, sliced

1 tsp. chili powder

1 can seasoned chili beans (I used Bush's)

1 jar medium salsa

1 large tomato, sliced

1 cup shredded taco seasoned cheese

Preheat oven to 400 degrees F. In a large saute pan, heat 1 Tbsp. olive oil over medium heat. Add onions and saute 8 minutes (or until transparent). Add mushrooms and saute until mushrooms are cooked through (about 8-10 minutes more). Stir in chili powder.

Pour cooked pasta into a 9x13" baking dish. Pour mushroom and onion mixture over the pasta and spread over the pasta. Next, pour beans and salsa over everything and spread as evenly as possible. Take the sliced tomatoes and arrange them on top so they aren't overlapping. Last, sprinkle the taco cheese over everything and cover with aluminum foil.

Bake for 20-25 minutes covered (until the center is hot), then uncover and and cook for 5-7 more minutes - until the cheese is bubbly.

Gettin' my mise en place together


Yummy sauteed veggies!


Spread over pasta!


Look at all those layers!


And there it be! YUM!


I must warn you, it falls apart just a bit because it's so warm and gooey, but I promise it will taste delicious!

Hope you enjoy it!


~ Mari

Thursday, August 19, 2010

Tarragon and Cheddar Frittata


The incredible edible egg was calling my name today for lunch. Do you ever get in an egg mood? So, I decided to make a frittata (an Italian omlet thingy) with some fresh tarragon that I had in the fridge. If you are also feeling a bit eggish, here's the recipe:

Tarragon & Cheddar Frittata

1 large egg

1/2 cup liquid egg whites (or 2 egg whites)

1 Tbsp. fresh tarragon (1 tsp. dried)

1 tsp. dill

1.5 Tbsp. shredded cheddar cheese

salt and pepper to taste

fat free greek yogurt (for garnish)

salsa (for garnish)


Whisk all the ingredients together (except for the garnishes, obviously) in a bowl until combined. Heat a small non-stick skillet to medium. Once the pan is heated, put about a tsp. of olive oil in and pour the egg mixture in as well. Then put a lid on it and allow it to cook for about 5-6 minutes (until you can slip a spatula underneath the frittata without it still being liquid-y). Flip the frittata over with the spatula and allow it to cook, uncovered, for about 3-4 minutes more. The frittata should be fluffy and set. Next, flip the frittata out onto a plate and garnish with a dollop of yougurt and salsa.

Now... eat it! I think you'll like it.


Thanks for looking!
~ Mari

Wednesday, August 4, 2010

Summer Watermelon & Feta Salad


So, I can't claim this recipe as my own, but I do think it warrants sharing. Last year, Ryan and I had a romantic dinner at one of my favorite restaurants in Atlanta - Kyma. It's a fantastic Greek restaurant in Buckhead. And this salad is what they served us first...YUM.


First, get a watermelon. I found this cute little seedless "personal watermelon" at Kroger that worked perfectly! There's always soooo much left over when I use a big watermelon. Thanks, watermelon farmers, for growing creepy little hybridized watermelons! Haha.


Slice that little guy up and put the pieces into a bowl. Then grab an onion.

Sliver it as thinly as possible.


Then crumble some Feta cheese (I used fat free) and chop some fresh mint. Put those on top of the watermelon along with the slivered onion. Next, drizzle the salad with balsamic vinegar and extra virgin olive oil.
Now, toss!


The perfect summer lunch: avocado, ham, and arugula panini with watermelon & feta salad. I'm a happy camper.


Yeah... it was good. Not gonna lie. The sweetness of the watermelon balances the saltiness of the feta cheese. Then the mint and onion add a freshness that really pleases the palette. Se delicious and refreshing! Thanks, Kyma! :)


~ Mari

Tuesday, July 20, 2010

Greek Salad with Arugula and Artichokes

Today for lunch I was in the mood for one of my favorite salads: Greek salad. Yum. There's nothing fancy about it, but it's delicious, healthy, and (best of all) salty! Hah. Didn't expect that one, did ya? But, who doesn't love salt. For realz.

So, here's all I did to get that beautiful insalata in the photo above:

I chopped some Cucumbers:

Then I sliced some cherry tomatoes in half:


Then I chopped up some Feta cheese, kalamata olives, and marinated artichoke hearts:

Then I threw in some baby arugula and tossed it all with extra virgin olive oil and balsamic vinegar. And as a last touch, I threw a dash of Italian seasoning on it!

Wahoo, right? Easy peasy. Hope you like it!


Cause I did! ;)


~ Mari

Saturday, May 22, 2010

Penne with Arugula, Ham, and Orange Wine Sauce


I just created my first dish as a married lady, and I'm quite happy with it! I had plans for flank steak, but didn't feel like driving to Kroger. So, instead, I used some stuff we already had and created...

Penne with Arugula, Ham, and Orange Wine Sauce

1 lb. Penne pasta, cooked (al dente, of course)
2 handfuls fresh arugula
4 slices of honey ham (from the deli)
1 tsp. extra virgin olive oil
grated parmesan cheese, to taste
salt and pepper to taste

For the sauce:
1 Tbsp. butter
1 c. white wine
1 clove garlic, smashed
3 Tbsp. frozen orange juice concentrate
1 tsp. Italian seasoning

In a small sauce pot, melt the butter. Add the wine, dollops of orange juice concentrate, Italian seasoning, and garlic clove. Allow to simmer until it has reduced to half of its original amount.

Slice the ham into strips and saute in a little olive oil until caramelized.

In a large bowl, toss the warm pasta with the fresh arugula, caramelized ham, orange wine sauce, and salt and pepper. Top with freshly grated parm and serve!

Enjoy! Ryan did... :)

~ Mari

Arugula on FoodistaArugula

Sunday, April 11, 2010

Eggs for Dinner


It was such a nice day out today that I thought I might make a light dinner. So, I decided a quiche would be perfect! We had some goat cheese and cherry tomatoes in the fridge, so I thought that would be a delicious mix.

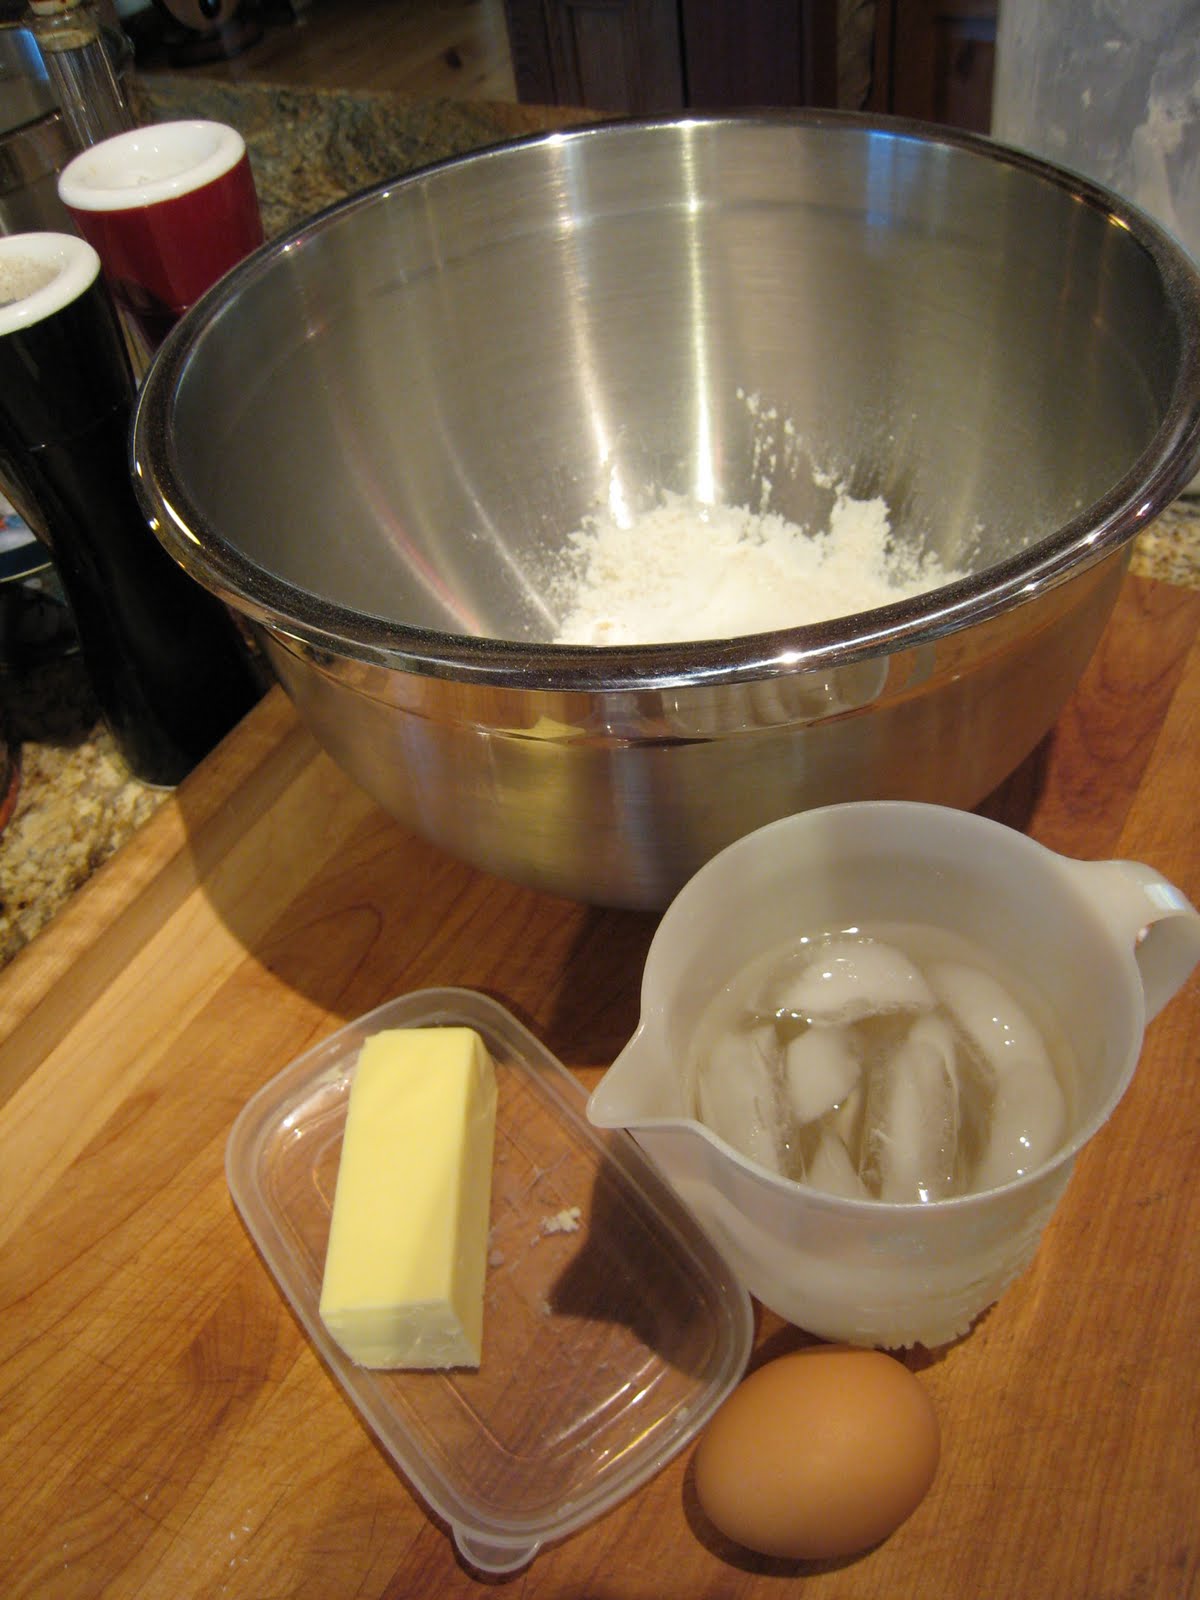
First, I made the dough for the crust. All you need for the crust is:

1/2 cup cold butter

1/2 tsp. salt

1/2 tsp. cracked black pepper

1/2 tsp. dried thyme

1 egg

1 Tbsp. ice cold water

1 1/4 cups unbleached all-purpose flour


Mix the flour, salt, pepper, and thyme together in a mixing bowl (with your hands...I promise it's fun!). Then chunk the butter, plop it in the bowl, and smoosh it around until the butter chunks are evenly distributed. Then pour in the ice water and mix it around. If it is too wet - add more flour. If it's too dry, add more water!
Then just wrap up your little dough ball in plastic wrap and stick it in the fridge while you work on the rest of your quiche!
Now, we will make the quiche filling. Here's what you'll need:

3 eggs

3/4 cup Half & Half

2/4 cup light soymilk

1 tsp. salt

1/2 tsp. ground nutmeg

1/2 tsp. dried thyme

8 oz. goat cheese

Combine everything in a bowl and mix it around until the eggs are completely combined. The goat cheese will be chunky , but that's fine!


By this time, your dough should be ready to roll (lol...)! Preheat the oven to 350 degrees F. Roll out the dough to be about 1/8 inch thick. Put it in a greased & floured tart pan and cut off the excess with a pairing knife. Then stick the whole thing in the fridge!

I had some extra pie dough and I didn't want to waste it, so I thought I would cut circles out of the dough (with a biscuit cutter) and bake them to make crispy, buttery crackers! They came out delicious!


I brushed them with egg so that they would brown and become nice and shiny!


After it's chilled, take your crust out of the fridge and cut a piece of parchment paper that fits in the bottom of the pan. Then put pie weights on top and stick it in the oven! Bake it for 15-20 minutes.
Then take it out of the oven and remove the parchment paper and pie weights. Brush the entire thing with egg and stick it back in for about 2-3 minutes. This will brown the crust and seal it off from the moisture in the egg mixture.


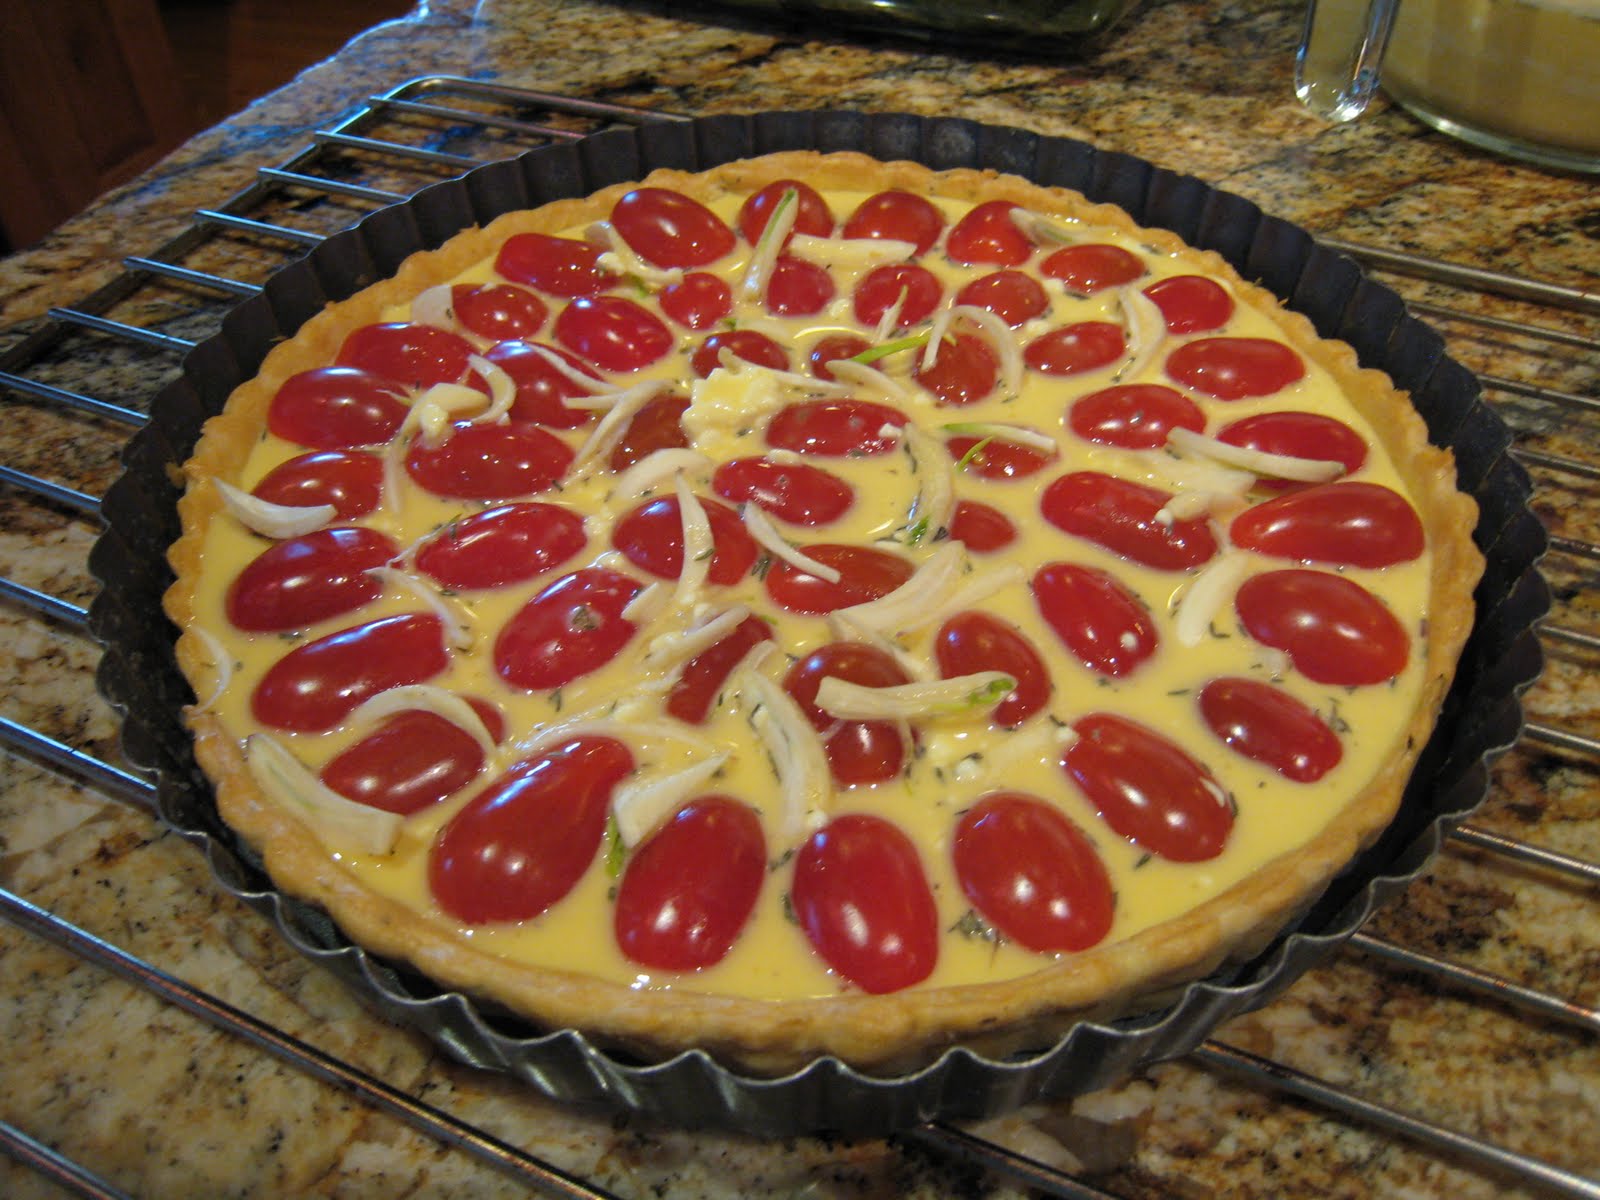
Once it's brown and delicious-looking, take it out and let it cool a little. Halve cherry tomatoes and place them on the pie crust cut-side down.


Sliver garlic cloves and sprinkle them over the tomatoes. Then poor the egg mixture over the whole thing, leaving the tops of the tomatoes peeking out.


Bake it for 20 minutes and it will be a beautiful thing of beauty! Let it cool, slice it, and serve it!


Mmmmmmm... it came out so good! We sliced it up (it kinda looks like pizza doesn't it?) and served it with some simple sauteed spinach with garlic and pine nuts.


Happy eating everyone!
~ Mari