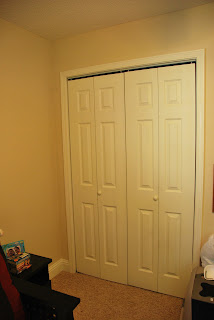
You know what's very easy to NOT do? Take some super grim-looking before shots of a closet that you plan to overhaul. I totally forgot to take a picture of what this closet looked like behind those doors a few days ago. But, I'm sure you can picture it: lots of plastic boxes full of crap, piles of computer cables, and some art supplies scattered around. It is the office closet afterall - our catch-all closet that had everything
but clothes in it.
So, since
Mom was in town, I decided to take advantage of her great ideas and organizational skillz and put her to work! Hah. I'd had this idea brewing in my brain for a while now: I needed a desk. Not a computer desk or a work desk, but a Mari desk. One where I could create artwork, write letters, etc. But, most importantly, one that I would not have to clean each time I used it. A tall order, I know. That's probably why I have no before pictures - because I didn't think I could pull off my plan! I wanted to turn the office closet into a space where I could close the doors and hide the clutter that a creative space would surely have. And that, ladies and gents, is what we did!
 |
| It's a closet desk! |
Basically, we took two nightstands (circa "I don't know when") with drawers and stuck them in the closet facing each other. Then my dad and Ryan went to Lowe's and bought a beautiful wooden "shelf" (for only $35). They cut it to fit and we stuck it on top of the tables. It ended up being a bit short, so we propped it up on some 2x4's and voila: desk in a closet!
 |
| Beautiful drawers (lol) |
 |
| The perfect space for creating! |
 |
| Paint Box |
So, there you have it! It really was an incredible transformation (sorry you couldn't enjoy it as much without that darn before pic...). And I can't wait to get in there and start creating!
~ Mari


2 comments:
i LOVE this and if i could get our guest bedroom closet cleaned out, i might just have to copy you...
It really didn't take that long to do! Feel free to copy away! Haha :)
Post a Comment